"Gitting" around a bad add
11 Apr 2023This lab is purely for reference, there is no assignment
So you added a file you should not have
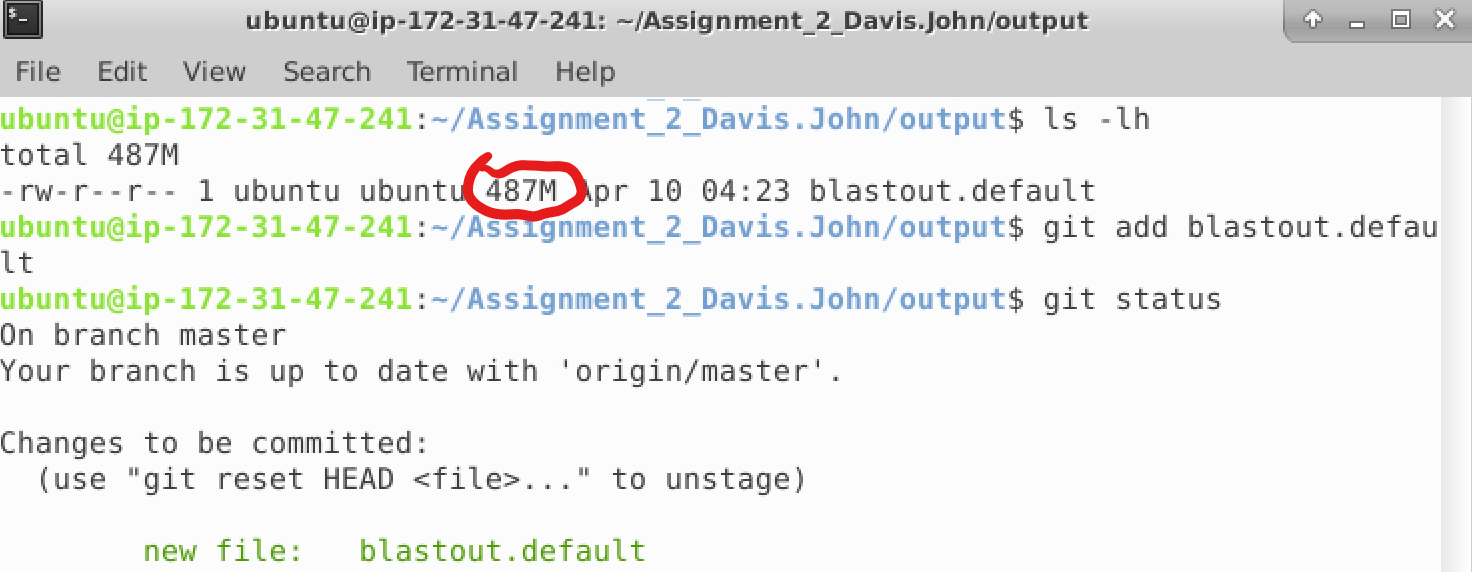
In this case, the file I added has several problems with it
- The file is 478Mb in size, way more than the 100Mb limit of Github
- I do not need to submit this file for my assignment
- Professor Maloof and John will be mad if they have to download unnecessary large files
Removing an added file before you commit it
The Good
The good news is that if you have not commit the file using git commit, it can easily be undone. All you have to do is use the git reset command. This will make it so Git is no longer tracking the file and the file will still be present in your repository. In this case the command looks like this:
git reset HEAD blastout.default
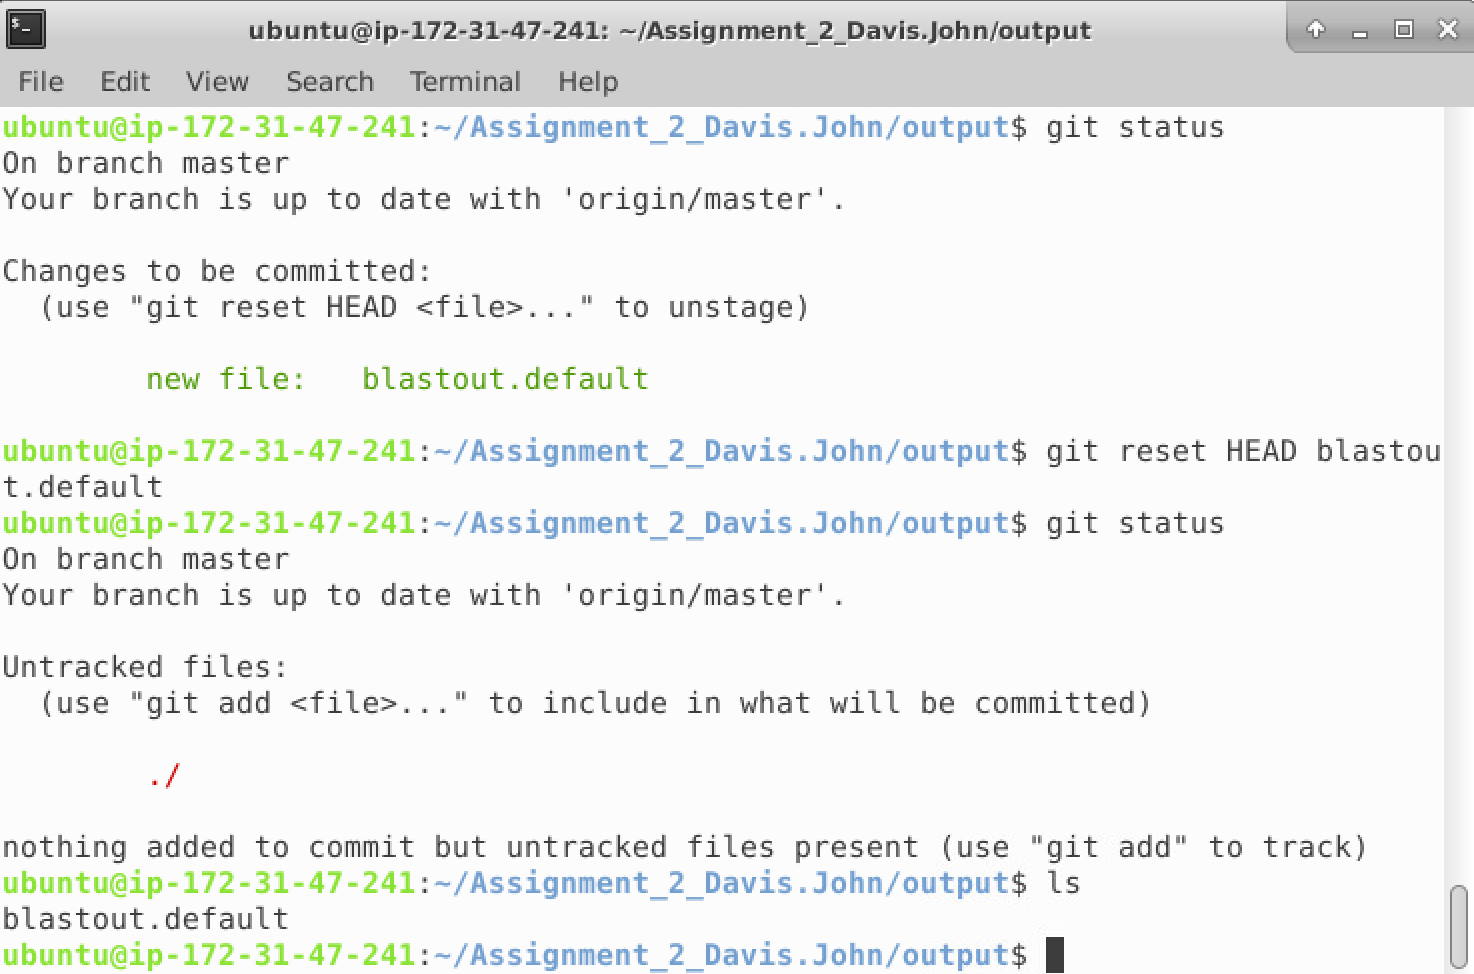
Just like that, the file has been removed from Git tracking in the same amount of time it took to add it. The file is also still present in the output directory.
Removing an added file after you commit it
If you are needing to refer to this guide, it is most likely because you were not lucky enough to catch and remove a problematic file before you commit it. When you went to push your changes to Github you were most likely faced with an error message similar to the one below
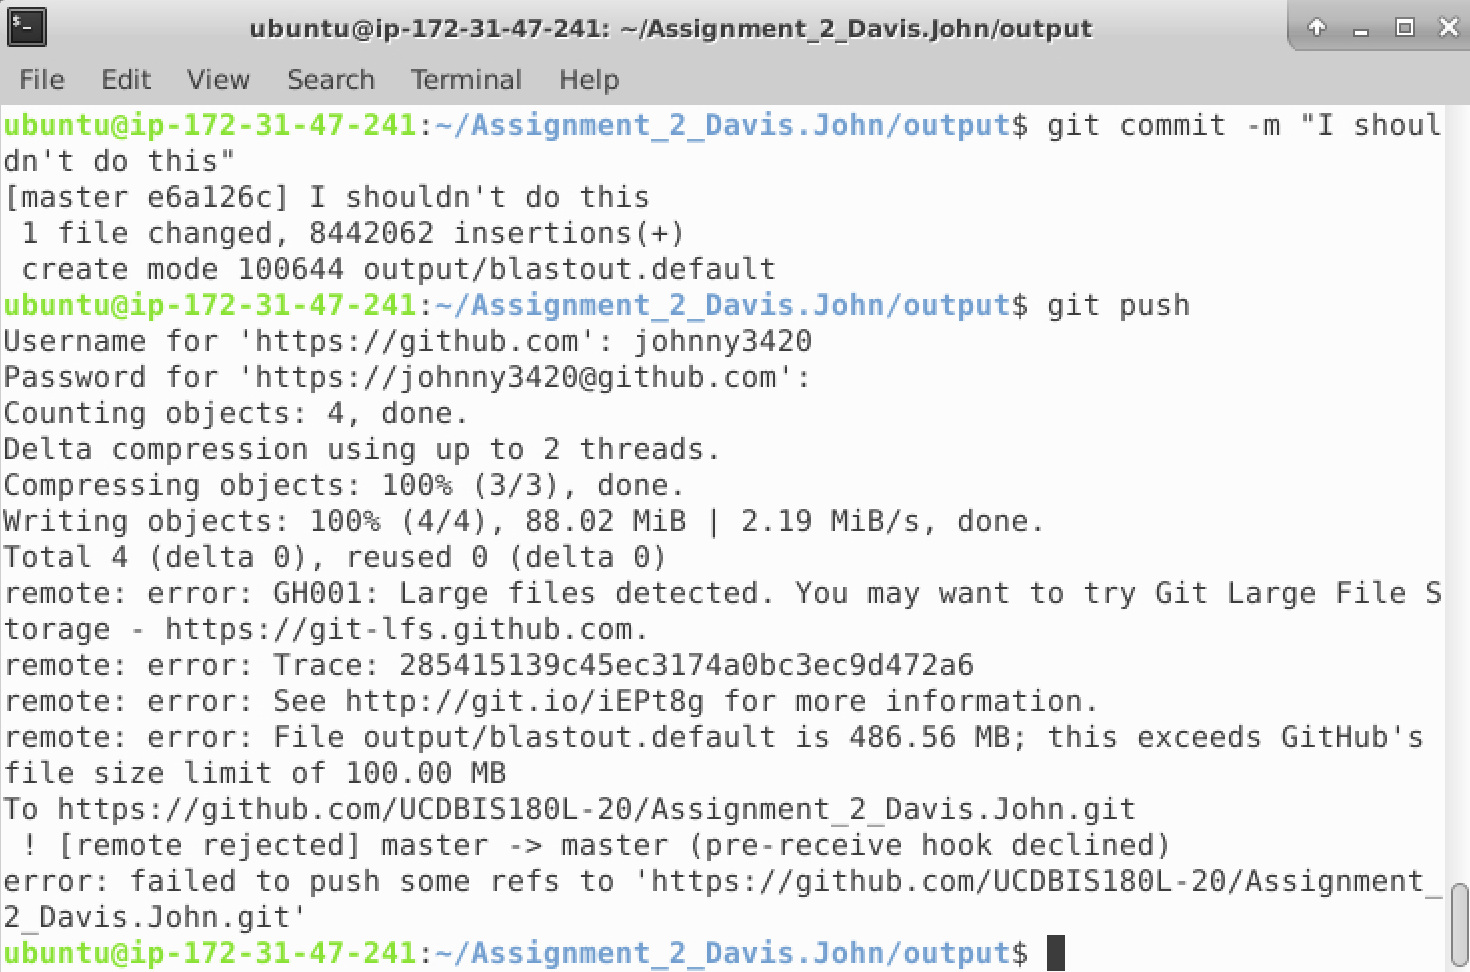
In this case Github refused to accept the file because the size of the file was greater than 100Mb. Now your first thought may be to remove the file from your repository thus eliminating the problem. Unfortunately, this strategy will FAIL to solve your problem.
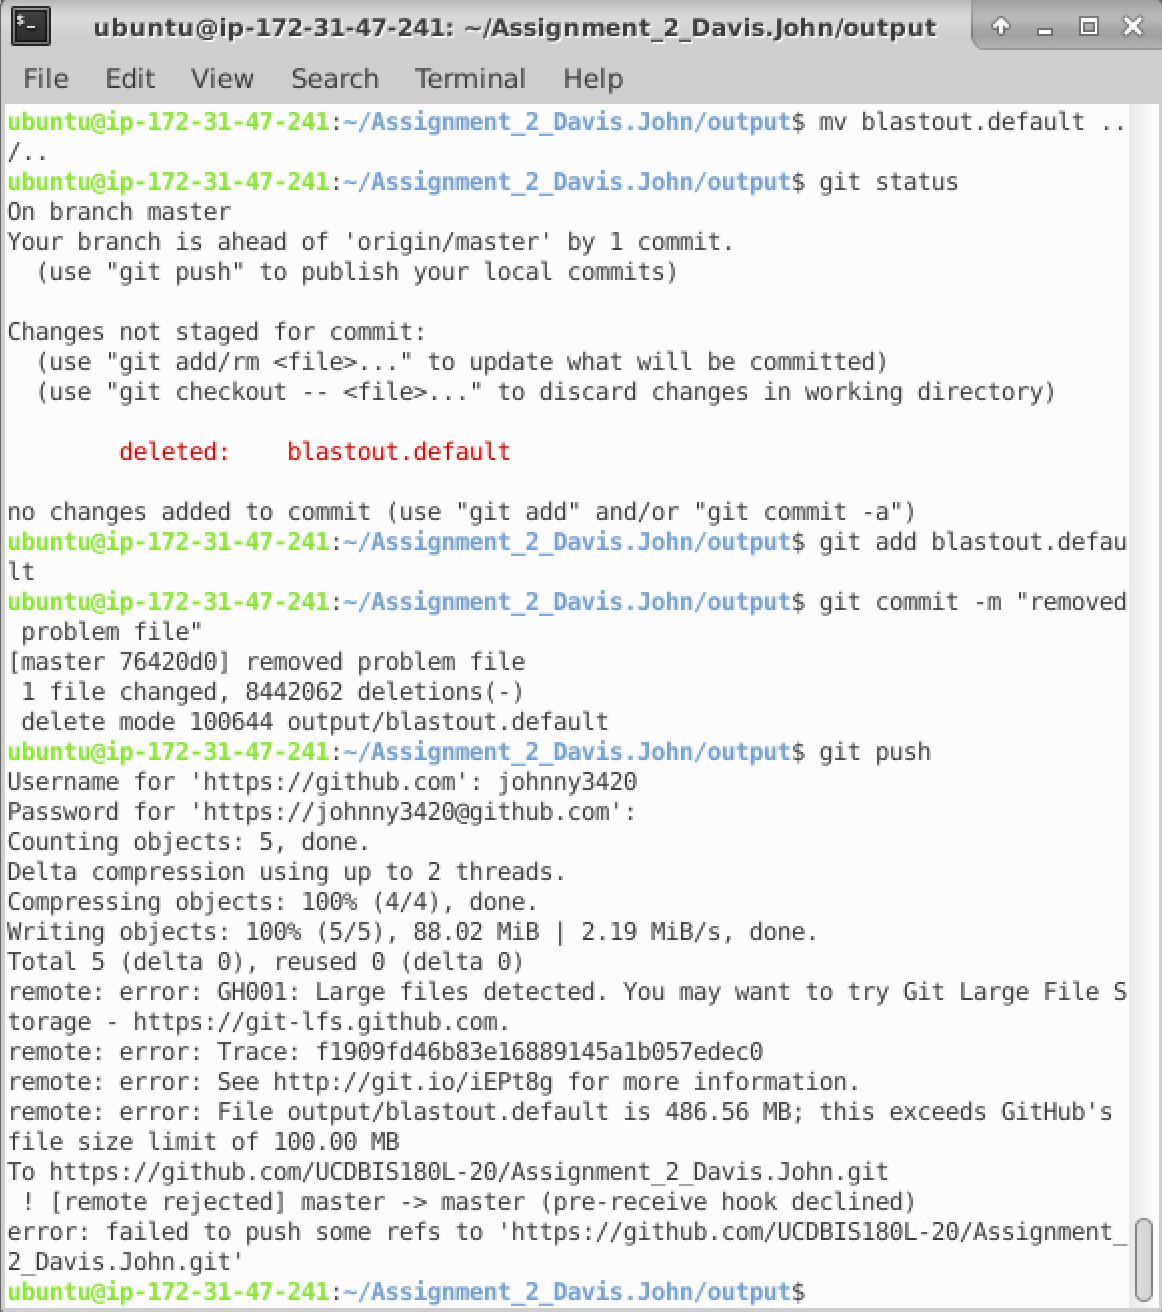
Git still has the file contained in its system. We can still remove the file from Git’s tracking, but how we purge the file will depend on when we committed the file.
Removing a file added in your most recent commit
The Bad
If you added the file in your most recent commit, the process to remove the file is straight forward and can be completed using basic git commands. In this case the code would be
git rm --cached blastout.default # remove the file from being tracked
echo "blastout.default" >> ../.gitignore # Add the file to our .gitignore file so we do not accidentally add it again
git add ../.gitignore # Add our changes to the .gitignore file
git commit --amend --no-edit # Commit the changes we made
git reflog expire --expire=now --all && git gc --prune=now --aggressive # Clean up our repo
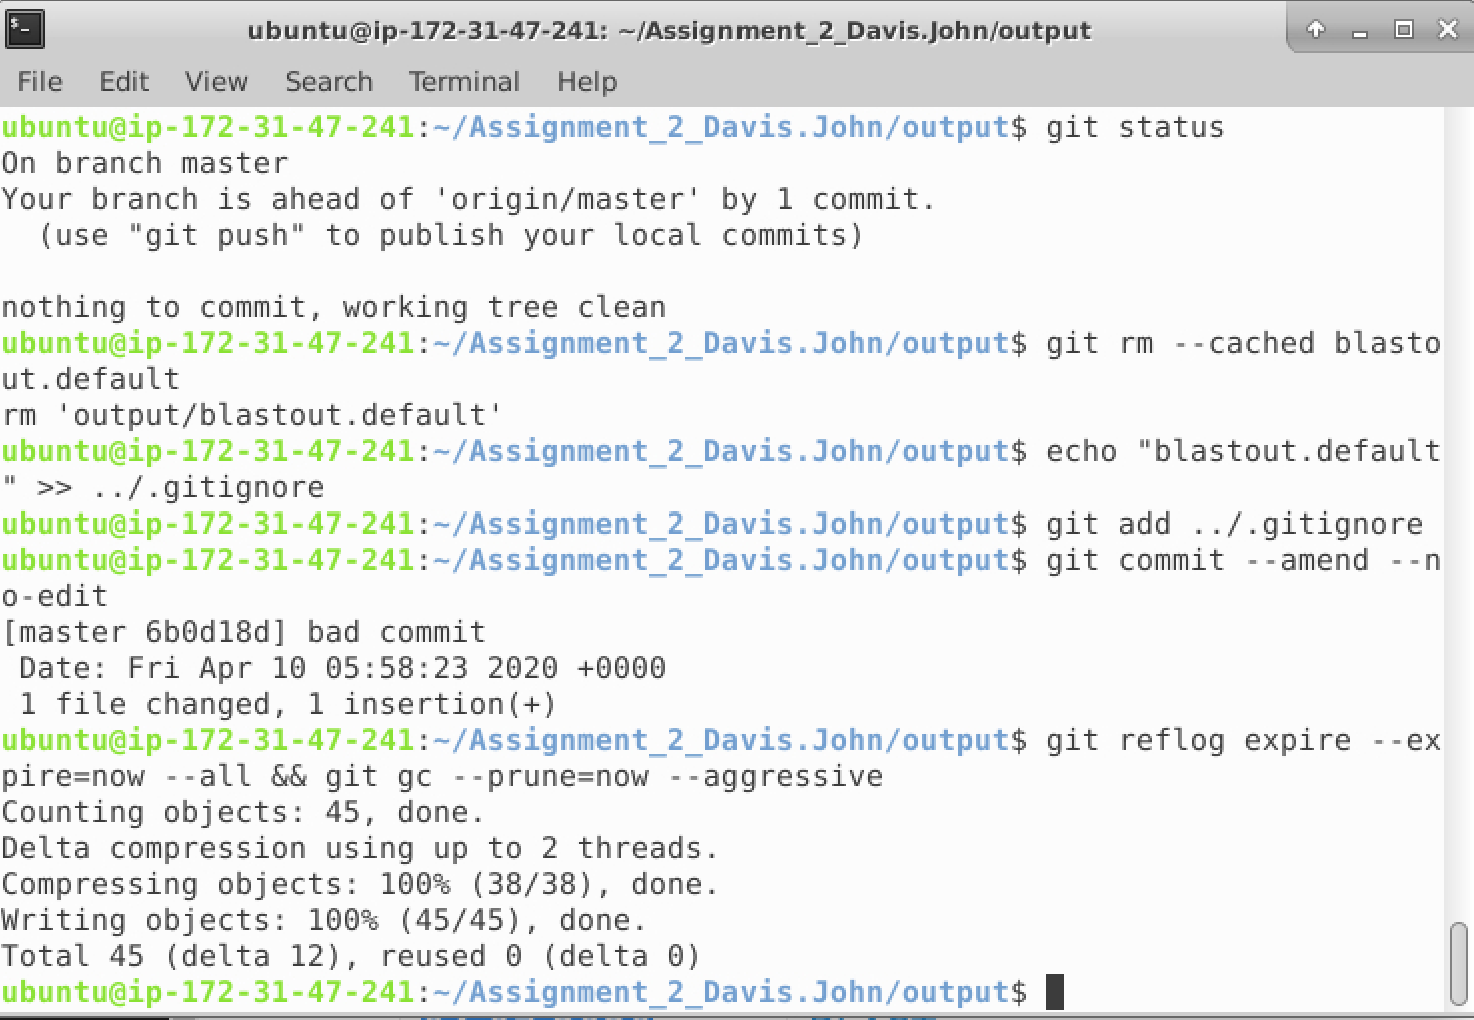
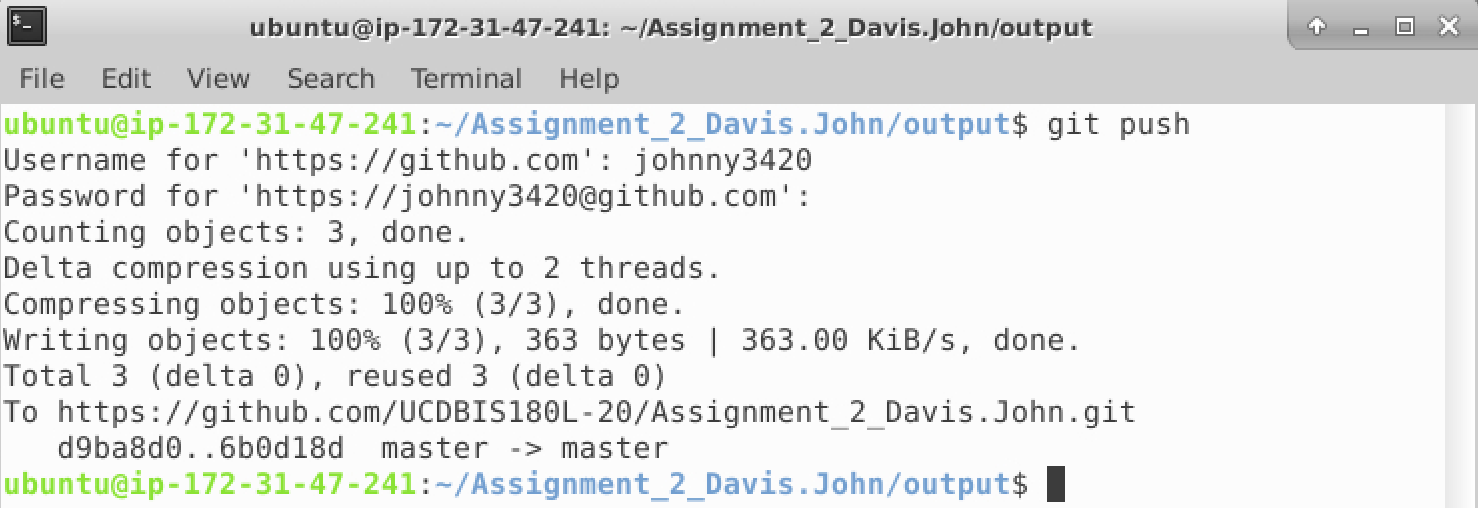
We are now able to push our changes to Github
Removing a file added in a past commit
The Ugly
If you added the file in a past commit which is not your most recent commit, the process to remove the file is a bit more involved. While the process to remove the file is possible using the tools proved by Git, we will be using a third party tool called BFG because it both faster and simpler to use. To install BFG, run the following commands
If you are a BIS180L student I have already installed this program for you
sudo wget -O /usr/local/src/bfg.jar https://repo1.maven.org/maven2/com/madgag/bfg/1.14.0/bfg-1.14.0.jar
sudo bash -c 'echo "java -jar /usr/local/src/bfg.jar \$*" > /usr/local/bin/bfg'
sudo chmod +x /usr/local/bin/bfg
With BFG installed, we can now use it to fix our git repositories. To start I am going to add the problem file and commit it. Next I am going to make a desired change to my README.md file, add it, and commit it. By doing this, my addition of the problematic file will no longer be my most recent commit
git add output/blastout.default
git commit -m "Bad Commit"
echo "Howdy" >> README.md
git add README.md
git commit -m "Good Commit"
git status
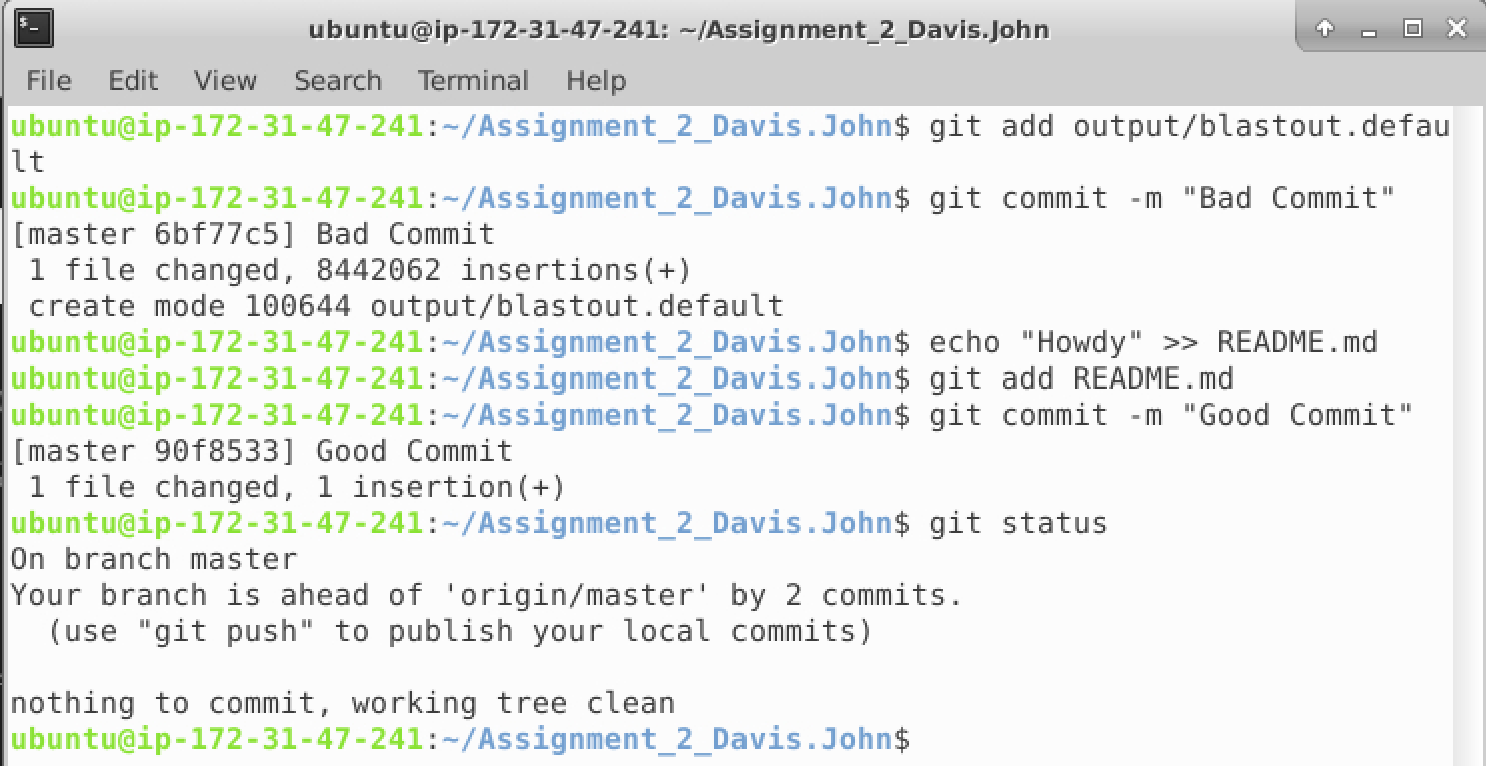
We are now ready to fix our repository using BFG. BFG has many applications, but we will only use it to remove all files greater than 100Mb from being tracked by Git. To do so, we run the following commands inside the root directory of our repository. In my case it will be ~/Assignment_2_Davis.John
cd ~/Assignment_2_Davis.John
git gc
bfg --strip-blobs-bigger-than 50M --no-blob-protection .
git reflog expire --expire=now --all && git gc --prune=now --aggressive
Now if we run git status we see that the problematic file has been added, but it is no longer committed. The next step is to once again remove it using the same method we used in the beginning of this guide.
git reset HEAD output/blastout.default
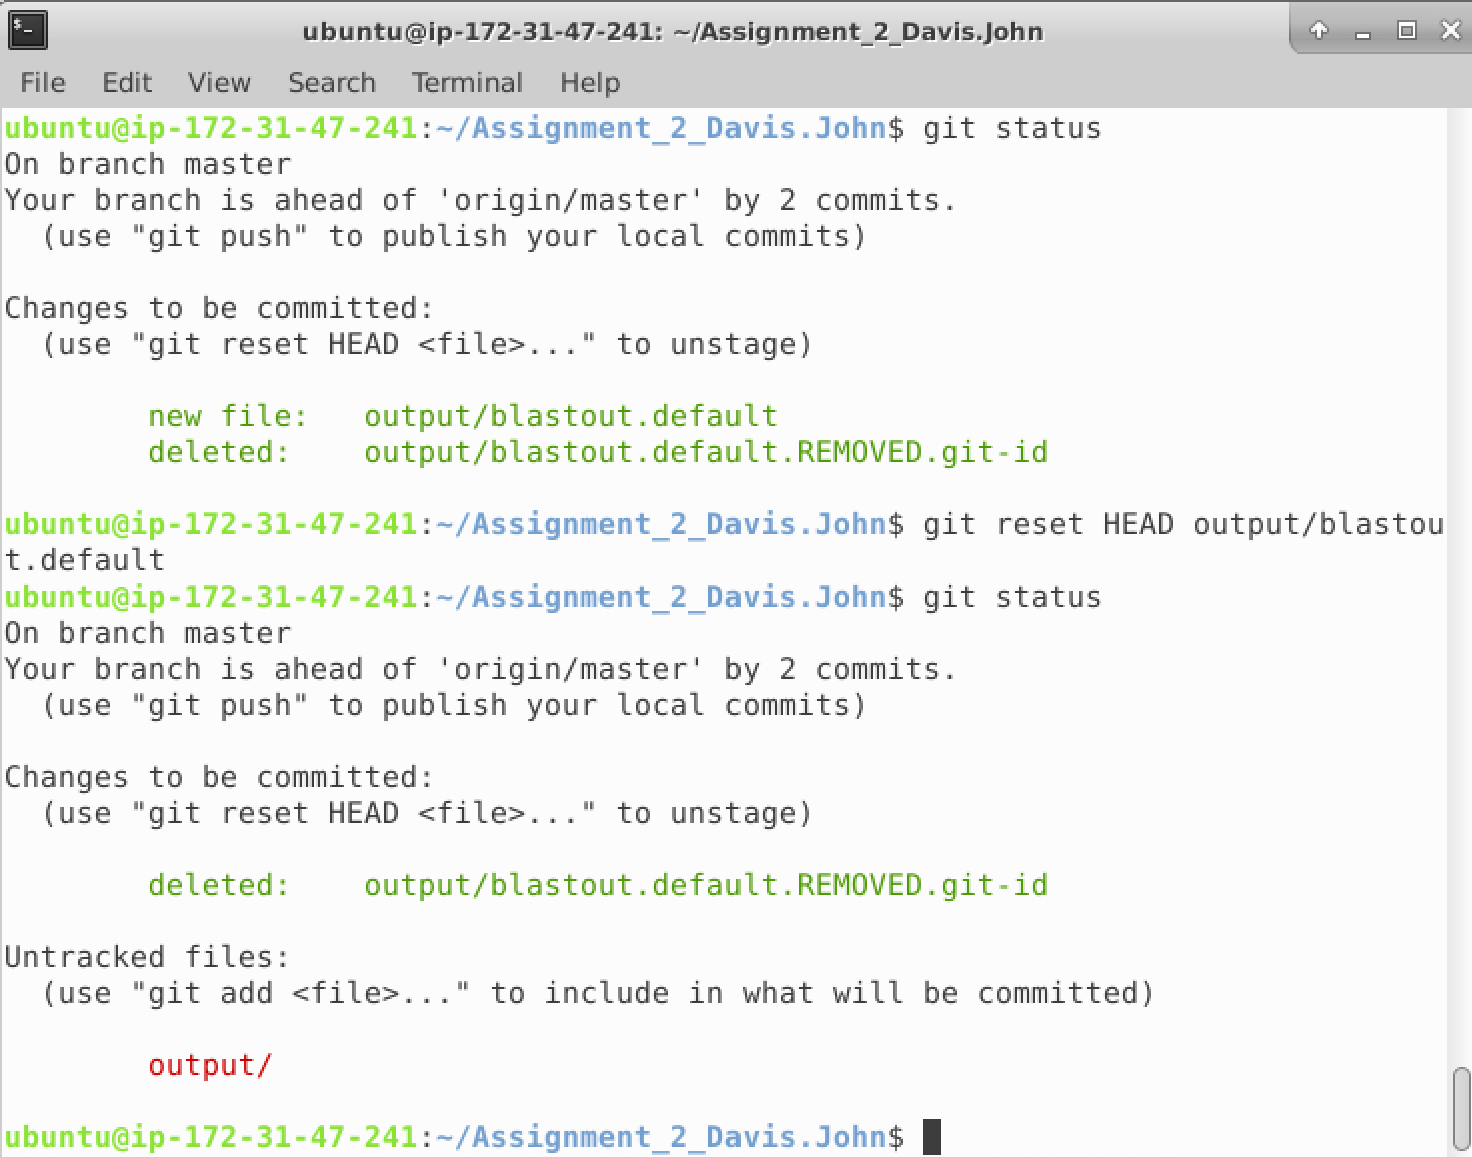
Last but not least we can commit our fix and push it to Github
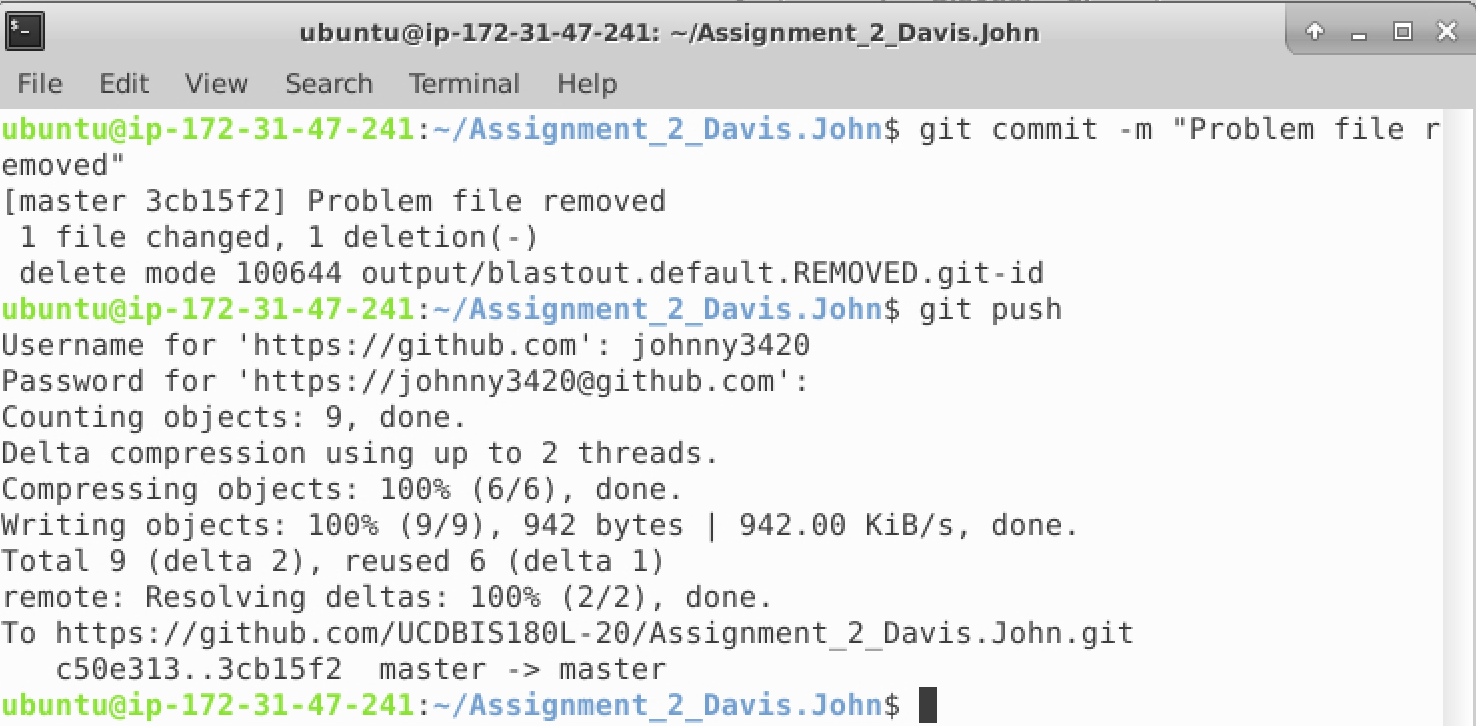
These methods should suffice for fixing your repository. There is one last method, perhaps the most simple and hacky method which will also “fix” your repository. I’ll describe it below.
The Lazy
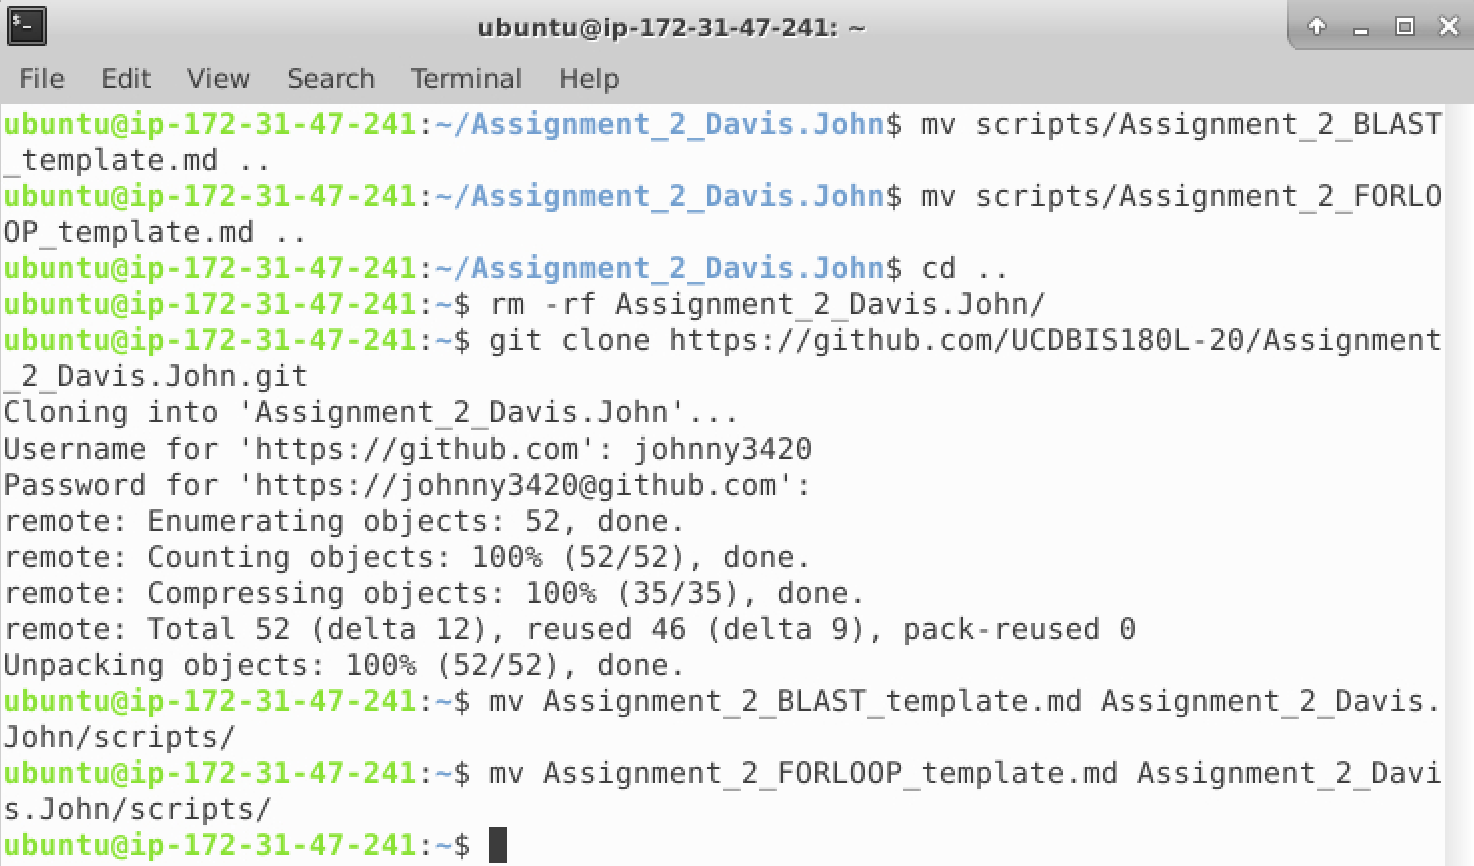
While the the previous methods will work to fix your repositories, this last method is simply saving your work and starting over. By this I mean copy all the files you need to a location outside your assignment repository, delete the repository, reclone the repository, and move the files back into your repository. Be careful though, any changes not already pushed to Github or copied to a location outside of the assignment repository will be Permanently lost.
